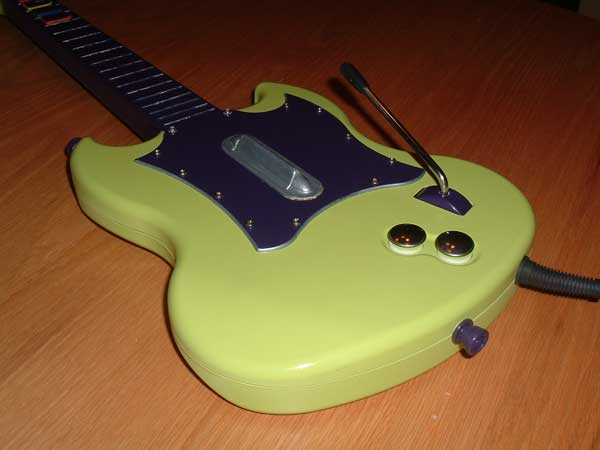
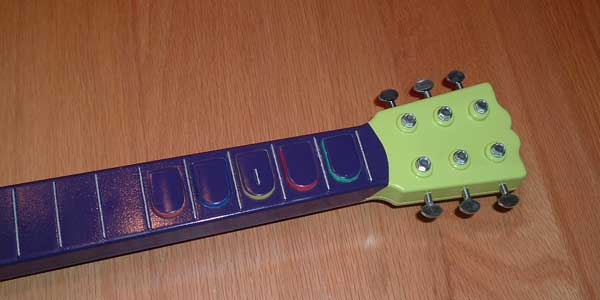
My first foray into custom painting is "The Joker", a lime-green and purple affair that looks a bit more garish than the photo indicates. There was no particular real-life inspiration, but the recent release of "Rocks the 80's" was an influence toward a fluorescent, hair-metal style.
I started with Rust-Oleum Primer for Plastics, a white primer that bonds to the plastic surface. I didn't do any surface prep besides wiping the parts down with a clean cloth, and masking off some of the interior areas and sides of the fret buttons.
Tip: Mask off all of the interior sections and the sides of your buttons. I mean everything; don't forget to mask the posts attaching the body and neck together, and the post holes under the pick guard. I had to do a lot of sanding later on to get everything reassembled smoothly, even though I had masked some of the areas during the lacquer phase. Trust me, leave all of the interior parts to be the raw plastic.
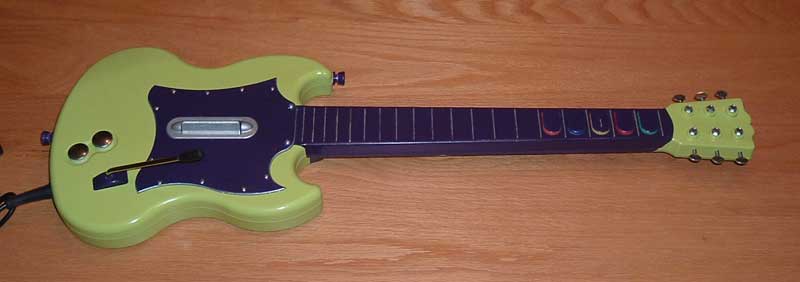
After letting the primer dry for an hour, I laid down three or four light coats of my base colors: Rust-Oleum Painter's Touch "Key Lime" for the body, and "Purple" for the neck. Each coat was very light, just like GTJem says, and I put each on about 5-10 minutes apart. I had the parts on two large pieces of cardboard, so I could move each out of my designated painting area Once the coats were done (and the Key Lime can was empty), everything sat for a day to dry.
Tip: After the base coats dry, wet-sand lightly with a 400 grit paper. I didn't sand until after the lacquer stage, and in some spots it was so rough I pretty much sanded right through the lacquer. If you do wet sanding with a high grit, you shouldn't take off too much paint.
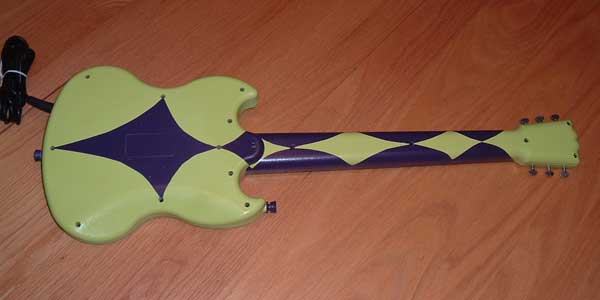
The next step was to do the design on the head and back. I kept it simple my first time, with a few diamonds masked with blue painter's tape. I held the tape at an angle and laid it down slowly and carefully to get the gentle curves of my design. I taped newspaper over the larger areas, like the corners on the body. I had some bleed-through, so you'll want to use several layers of paper for this type of masking. The top colors needed another 3 coats or so, and were left to dry for another day.
Tip: Make sure you've thoroughly painted all the nooks and crannies — the SG has a lot of odd shapes that make it hard to cover. Don't forget to spray the edges where the front and back pieces join — you don't want a red stripe in the center of your green guitar.
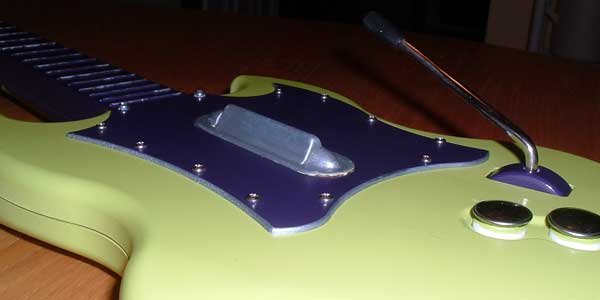
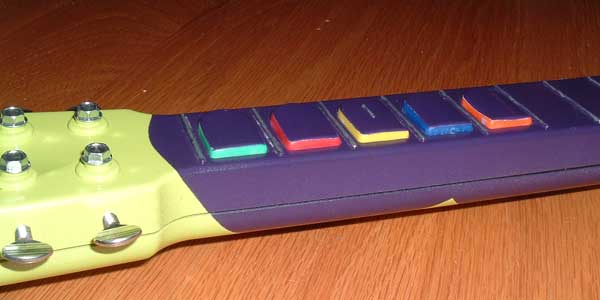
My silver accents were done with a small jar of Rust-Oleum silver hobby paint. I used a Q-tip to apply paint carefully to the frets and to the ridge on the yellow button. (Apparently I'm the only GH player who actually uses the ridge to stay in position during slides.) The silver also went on the strum bar and surrounding ledge, and on the side of the pick guard. The paint dried to a dull, hammered look, but that "used" look fit with the style I wanted. If you want more of a chrome look, stick to spray paints.
Tip: The trick to painting the pick guard edge actually comes after the painting step. I had the typical messy edge, but I dry-sanded with 400 grit paper all along the top edges of my pick guard. That took all the silver paint off of the top, leaving a nice smooth transition from the top to the side.
Finally it was time for lacquer, Rust-Oleum again. This time, light coats didn't work so well; the finish was rough and sandy after two light coats. I laid it on a little too thick on the third coat; it pooled in places and actually caused the underlying paint to crack in one spot. A fourth medium coat was "good enough" for me, but I never really got the hang of the lacquer. Maybe next time.
As I mentioned before, I was going for a slightly "used" look, so I decided at this stage to inject a bit of personality into the finish. I let the lacquer dry for about an hour, so it was dry to the touch but not cured. Then I wet-sanded with a 400 grit paper. The slight pressure on the drying lacquer introduced some opacity to the finish, particularly along the fretboard. (I couldn't capture the look with my crappy camera, sorry.) The guitar isn't quite distressed, but it has a slightly weathered look as if it's been on tour for a while.
I wanted to leave the fret buttons unpainted on the sides, to prevent "sticky fret syndrome" and to leave a bit of color like the GH3 or Rock Band controllers. I painted pretty much the entire top, so there's just a hint of the original colors where the buttons protrude. When you're actually playing, you see just as much of the original color, since you only see the top anyway.
Tip: You should avoid any paint or lacquer on the sides of the fret buttons, or the holes of the fretboard where the buttons go. Yes, I gave this tip before. Yes, it does bear repeating. I spent two hours sanding with an emory board to learn this lesson; don't be stupid like me.
I let the lacquered parts sit for a week before re-assembly. The pick guard wouldn't fit entirely back into its groove, because of all the paint and lacquer on its sides. I decided to just let it sit a little higher than before; it's not really noticeable, and the original screws hold it in just fine. Aside from a whole bunch of sanding (see previous Tip), not much to report, but I took the opportunity to do the strum bar Velcro mod and to fix my broken whammy bar.
Tip: A few new hardware accents can really complement your custom paint job. Lucky for you, there's a whole page of no-paint customizations you can try.